Dope gear temperature guide: Full setups for every cold range
Ready for a day on the hill but unsure which kit to wear based on the mercury reading? Check out our Dope gear temperature guide to set up in all types of temps.

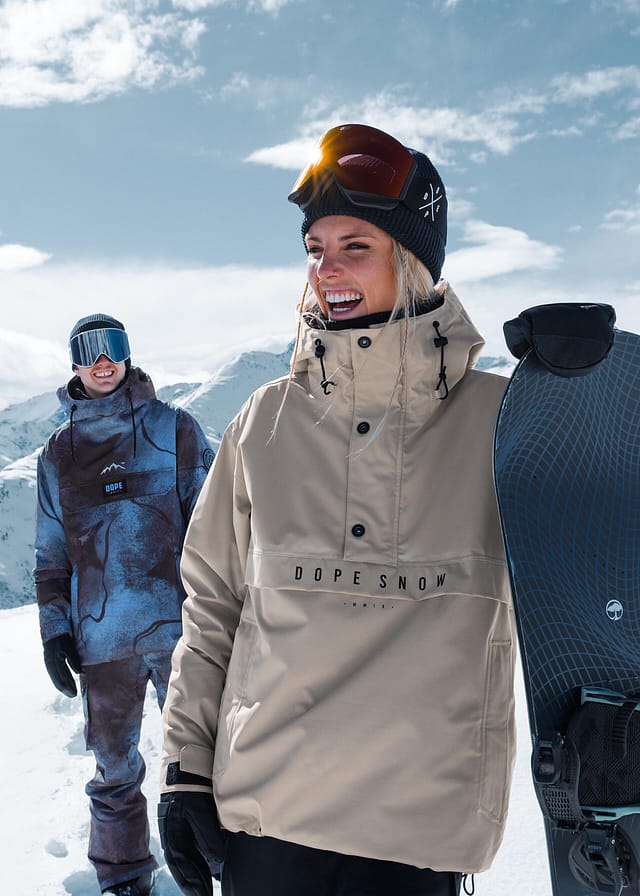
Drop in to our temperature guide. Just find the right range and add our top gear picks to your basket. After all, no one wants a sweat fest because you’ve misjudged and worn too many layers. On the flip side, you definitely don’t want to be a shivering, teeth-chattering wreck after underdressing on a sub-zero pow day.
Of course, feel free to tweak our recommended setups depending on how you feel (some riders naturally run colder than others) and how you ride. It’s all down to personal preference and what layering combo feels the best for you. New to layering? Our ski layering guide walks through the three-layer system that anchors every setup below.
How to stay comfortable whatever the temp
Spring or mild conditions: 45° to 30°F
Standard winter: 30° to 15°F
Getting colder: 15° to 0°F
Super cold: below 0°F
How heat escapes
3 tips to stay warm
Spring or mild conditions: 45° to 30°F

- 1Baselayer tops and bottoms (such as our Snuggle range)
- 2Shell or softshell jacket (Legacy, Blizzard pullover, or Yeti)
- 3Shell pants (our B.I.G. pants)
Start with a moisture-wicking baselayer top and bottoms (such as our Snuggle collection, made with a highly breathable recycled polyester-spandex blend). These help manage sweat, regulate temperature, and boost breathability for all-day comfort.
Next, add a waterproof, windproof shell (e.g., our Legacy jacket or Blizzard pullover) or a softshell jacket (such as our Yeti). Pair these with shell pants (check out the B.I.G.). Shell outerwear forgoes insulation to keep things light and versatile. It also places the layering power in your hands, so you can add or shed layers depending on how cool or hot you ride. Want to see when each type of Dope jacket makes sense? Our Dope insulated vs shell jackets guide walks through it. Build your spring or mild-condition setup below:


Standard winter: 30° to 15°F

- 1Baselayer tops and bottoms (Snuggle range)
- 2Insulated jacket (Adept or Blizzard Full Zip)
- 3Insulated pants (Iconic or Blizzard pants)
“Standard winter” is the range most riders are likely to experience, i.e., mid-season conditions. Once again, start with breathable baselayer top and bottoms to help regulate temperature and retain warmth.
Then, include an insulated, weatherproof jacket and pants. For example, pair our Adept jacket with our Iconic pants. Opting for medium-weight insulation (such as 60 gsm in the body and 40 gsm in the sleeves, hood, or legs) offers the perfect balance between warmth and performance. That way, you can take on whatever Mother Nature has in store. Build your standard winter setup below:


Getting colder: 15° to 0°F

- 1Baselayer tops and bottoms (Snuggle range)
- 2Midlayer (Sublime, Comfy, or Cozy fleeces)
- 3Insulated jacket (Akin, Spartan, or Blizzard Full Zip)
- 4Insulated bibs (Notorious B.I.B or Vertex)
When things get extra cold, your layers have your back (and whole body!). At this stage, you can layer a cozy, reliable midlayer, such as our Comfy fleece, over your Snuggle thermal baselayers. This helps lock in heat, so you stay toasty even when powder reaches waist height (you lucky thing).
Speaking of waist, you can also opt for insulated bibs, such as our Notorious B.I.B. These bibs keep your core warm and offer extra coverage to stop any snow from getting in and cooling you down. Don’t forget an insulated jacket, too: our Spartan is the perfect additional barrier against the cold. Once you’ve piled on the layers, it’s time to pile on the fun! Build your cold-weather setup below:


Super cold: below 0°F

- 1Baselayer tops and bottoms (Snuggle range)
- 2Thick midlayer (Pile fleece)
- 3Insulated jacket (such as our Akin, or a heavily insulated puffer, such as our Puffer Full Zip)
- 4Insulated bibs (Notorious B.I.B or Vertex)
Sometimes, the best mountain days are served cold…And we mean really cold. So, to make sure you don’t freeze and experience FOMO, it’s wise to get strategic with your layers. First, reach for your trusty, toasty Snuggle baselayers. Next, add an extra-chunky fleece (around 285 gsm) to stay ultra-warm without sacrificing breathability. Our Pile fleece is mega cozy for super-fun times.
For outerwear, choose insulated bib pants (e.g., our Vertex or Notorious bibs) to really dial in warmth and protect against snow intrusion. You can also take on sub-zero playgrounds with a heavily insulated puffer jacket. Our Puffer Full Zip has 200 gsm of insulation throughout to help you face freezing storms and ridiculously chilled mountain laps. Build your setup for super cold days below:


How heat escapes
When riding, body heat escapes in four key ways: convection, radiation, conduction, and evaporation. For example:
- 1Convection (i.e., wind chill): Moving about on the hill exposes your body to non-stop airflow. If you’re not dressed in the right protective setup, the wind can strip away any warm air trapped by your clothing.
- 2Radiation: Skin radiates heat, so sealing it through layering is key. That’s why it’s so important to choose the right coverage before getting on the hill.
- 3Conduction: When we come into contact with snow or cold surfaces (such as a frozen chairlift), heat is pulled directly away from our bodies. So, it’s key to layer up and choose waterproof, protective outerwear (with insulation when needed) alongside key accessories.
- 4Evaporation: Sweating cools us down when we’re hot. However, if sweat can’t escape through our clothing, it sits on our skin and inadvertently makes us super cold…Not what you need in mountain temps. So, choose breathable, heat-retaining materials that allow moisture to move through your layers.
3 tips to stay warm

Although losing heat seems inevitable, there are extra ways to stay toasty and keep your body temperature nice ‘n’ balanced. These include:
- Work the features: Use your outerwear’s details to help trap warmth and prevent snow from entering. This might include zipping up your pants’ mesh vents, buttoning your jacket’s snow skirt, cinching in hems, and sealing wrist cuffs.
- Protect your extremities with accessories: Did you know that hands lose heat faster than other parts of the body when not properly insulated? So wear ski gloves or mittens. You also lose heat rapidly through your feet and head, so add high-quality ski socks, a facemask, and a helmet.
- Keep moving: Gridlocked in a lift line? Offset being still for too long by introducing small movements. This helps get your blood pumping again, so the chill has no chance of setting in. Yew!
Wrapping up
Whatever the temperature, you’re good to go. Of course, some riders run cold while others run hot. So choosing your setup is a pretty personal thing. Use our guide as a launchpad and tweak it until you’re 100% comfortable.
Have an unanswered question about which setup to select? Reach out to our rad team at crew@dopesnow.com or via Chat on our website.